
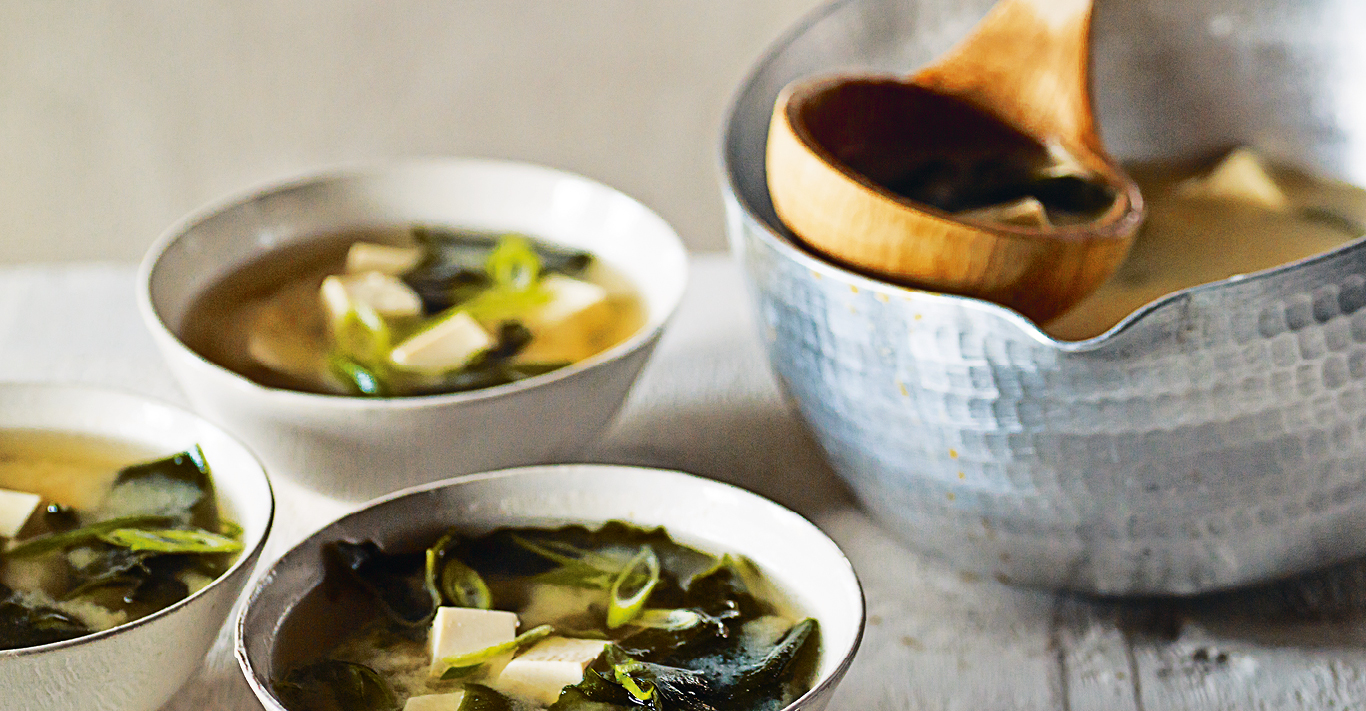
Not so long ago, Japanese food was something of an enigma in Britain. Today, Brits are as au fait with a pair of chopsticks and sashimi as they are a Sunday roast. Yet, despite the popularity of Japanese cuisine, it is still relatively unexplored at home. Self-taught Japanese cook Kimiko Barber is on a mission to change that with her new book, Japanese in 7. Using just seven ingredients or fewer, Barber makes authentic Japanese cooking a doddle with simple, accessible and delicious recipes, such as yellow tail sashimi and grilled aubergine in miso soup.
Japanese in 7 by Kimiko Barber (£17.99; Kyle Books), out now
MOON UDON [TSUKIMI UDON]
Tsukimi, which literally means “moon viewing” in Japanese, is a genteel pastime in autumn when the air is clear and the moon is full. Here, the whole yellow egg yolk in the centre is depicted as the full moon surrounded by semi-cooked egg white and noodles as clouds. Choose the freshest eggs you can find.
Serves 2
200g dried udon noodles
300ml all-purpose noodle sauce
2 tablespoons mirin
4 slices of kamaboko, fish paste cake (optional)
2 very fresh eggs
1 spring onion, finely chopped to garnish
shichimi- tōgarashi (seven-spice chilli powder) to serve (optional)
Cook the noodles and portion between two warmed bowls. Keep warm. Preheating the bowls is particularly important for this recipe as you need all the retained heat to semi-cook the eggs.
Meanwhile, heat the noodle sauce and mirin in a saucepan with 400ml (14fl oz) of water to just below boiling. Pour half a ladleful of hot broth over each noodle mound and keep the rest on a simmer.
If including kamaboko, arrange 2 slices at the side of the noodles. With the back of a ladle, make a hollowed nest in the centre of the noodles. Crack an egg and gently place the whole egg in the nest and ladle the remaining broth around it, then immediately cover each bowl with clingfilm to “poach” the egg for 1 minute. The egg white should turn opaque white from the heat of the broth, but if you prefer the egg more cooked, microwave (800W) for 10–12 seconds.
Remove the clingfilm, garnish with the chopped spring onion and a sprinkle of shichimi-tōgarashi, if liked, and serve immediately.
PRESSED SUSHI OF SMOKED SALMON
An oshi-bako, a press mould, is a specialist piece of equipment, available online, but you may not want to invest in one unless you are going to make sushi regularly. Alternatively, use an ordinary pastry cutter or a cooking ring.
Serves 4
400g prepared sushi rice (recipe below)
200g smoked salmon
2 teaspoons wasabi paste
4 teaspoons salmon roe
2 teaspoons sake
Divide the rice into four equal portions. Using a cooking ring or a pastry cutter (about 8cm/3¼in diameter), stamp out four circles of smoked salmon. Do not worry about offcuts because they will be used to make edible garnishes later. Wet the cooking ring (to stop the rice from sticking) and place it in the centre of an individual plate.
Add a portion of sushi rice and press down firmly with the back of a dessertspoon so that the rice is compact and smooth over the top. Spread some wasabi paste evenly on top and gently lift up the ring. Place a smoked salmon circle on top. Repeat with the remaining rice portions and smoked salmon circles.
Cut the salmon offcuts into large rose petal shapes, then lay 3–5 pieces on the chopping board, overlapping, and roll up. Place a salmon rose on the top of each serving. Mix the salmon roe and sake together in a small bowl. Spoon a teaspoon of the roe mixture, slightly off-centre, over each rose and serve.
HOW TO PREPARE SUSHI RICE
Makes 800–840
400g short-grain rice
1 postcard-sized piece of dried kelp
6 tablespoons + 1 teaspoon sushi vinegar (info below)
Wash the rice under cold running water, drain and set aside for 30 minutes–1 hour to let it absorb the moisture.
Put the washed rice and 440ml (15½fl oz) of water in a heavy-based saucepan with a tight-fitting lid. Make some slashes in the kelp to release more flavour and place it on top of the rice, then wait for 10–15 minutes before turning on the heat. Cover, bring to the boil over a high heat and, when it just begins to boil, remove and discard the kelp. Reduce the heat to medium and continue cooking for 6–7 minutes, then reduce the heat to low and simmer for 12–15 minutes, or until steam stops escaping. Turn off the heat and leave it to steam, with a tea towel wrapped around the lid to stop condensation dripping down on the rice, for 10–15 minutes.
Moisten a hangiri (see tip) to stop the rice from sticking. Spread the hot rice in a thin layer in the tub. Sprinkle the sushi vinegar over the rice, then, with a moistened rice paddle or a flat spatula, toss the rice using cut-and-turn strokes (the lateral motion separates and coats the grains without bruising or mashing) and at the same time cool it quickly by fanning. This is a bit tricky to do by yourself, so either get someone else to fan the rice or, if you are on your own, alternate tossing and fanning rather than juggling both.
Sushi rice is ready when it has cooled to room temperature and the grains are fluffy and glisteningly shiny. Try not to overdo this as the rice will become sticky and heavy. To keep sushi rice from drying out, cover it with a clean, damp cloth until needed, but use it up on the day it is prepared.
COOK’S TIP
A hangiri is a specially designed shallow wooden tub, made of Japanese cypress and hooped with copper. Hangiri are expensive, even in Japan, so you can use any wide, shallow, non-metallic tub instead.
Sushi vinegar is a blend of rice vinegar with sugar and salt. There is a huge range of different formulas and each sushi bar jealously guards their secret recipe. But the most general guide is, using the dry weight of rice as the base measure, 10 per cent of vinegar, 5 per cent of sugar and 1 per cent of salt as shown below.
(Adjust the amount of sugar or salt as preferred)
200g (7oz) rice
220ml (7fl oz) water
20ml (4 teaspoons) rice vinegar
10g (¼oz) sugar
½ teaspoon salt
Tokyo Roll
This is a Japanese variation on the Swiss roll.
Serves 6-8
100g (3 and ½ oz) caster sugar, plus extra for dusting and dredging
100g (3 and ½ oz) plain flour, plus extra for dusting
10g (1/4 oz) matcha (green tea powder)
4 large eggs
200ml (7fl oz) double cream
100g (3 and ½ oz) koshi-an (smooth sweet adzuki bean paste)
Icing sugar, for dusting
Preheat the oven to 180°C/350°F/gas mark 4. Grease and line a 33 x 23cm (13 x 9in) Swiss roll tin with nonstick baking paper. Dust with a half-and-half mixture of caster sugar and flour.
Mix the flour with the green tea powder and sift 2–3 times.
Put the eggs and sugar in a bowl, place over a pan of simmering water and whisk, using an electric hand whisk, until pale, creamy and thick enough to leave a trail on the surface when the whisk is lifted.
Remove the egg mixture from the heat, then sift half the green tea-flour mixture over and gently fold in with a metal spoon. Repeat with the remaining green tea-flour mixture, then lightly stir in 1 tablespoon of hot water.
Pour the mixture into the prepared tin, then tilt the tin backwards and forwards to spread the mixture evenly. Bake for 10–12 minutes, until well risen and firm to the touch.
Meanwhile, place a large sheet of greaseproof paper on top of a clean, damp tea towel.
Dredge the paper thickly with caster sugar.
Working quickly, turn out the sponge on to the paper, trim off the crusty edges and let it cool down. While the cake is cooling down, whisk the cream until soft peaks form. Spread the cream over the cake and make a line of adzuki bean paste along the long edge nearest to you.
Roll up the cake, starting from the long edge with the paste on, with the aid of the paper.
Make the first turn firmly so that the whole cake will roll evenly and have a good shape when finished, but roll more lightly after the first turn. Place the cake, seam-side down, on a chopping board, dust with icing sugar, then slice and serve.
Related Articles

Blithe spirits
Set amid a thriving theatre scene, the Delaunay Bar launches a cocktail menu inspired by the golden age of the stage in the West End
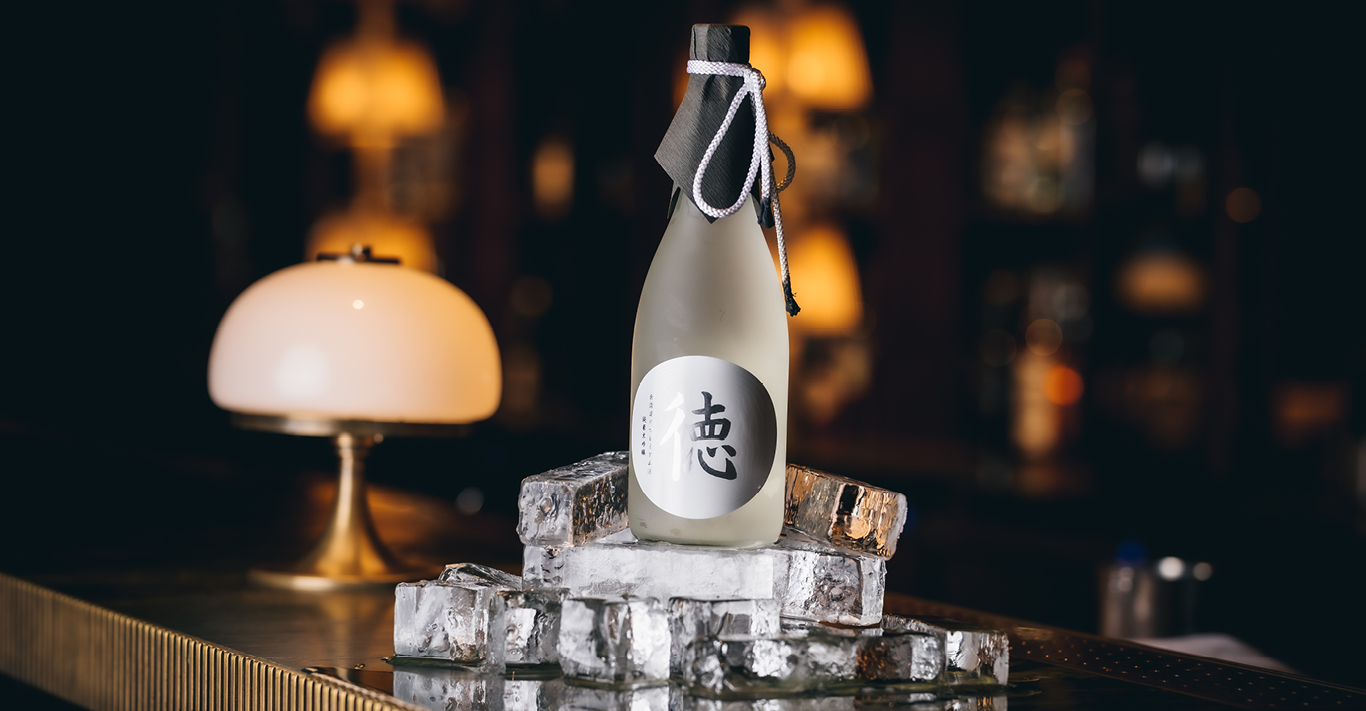
Is sake here for good?
British-owned premium brand Toku, brewed in Hokkaido, is adding a new polish to the Japanese drink
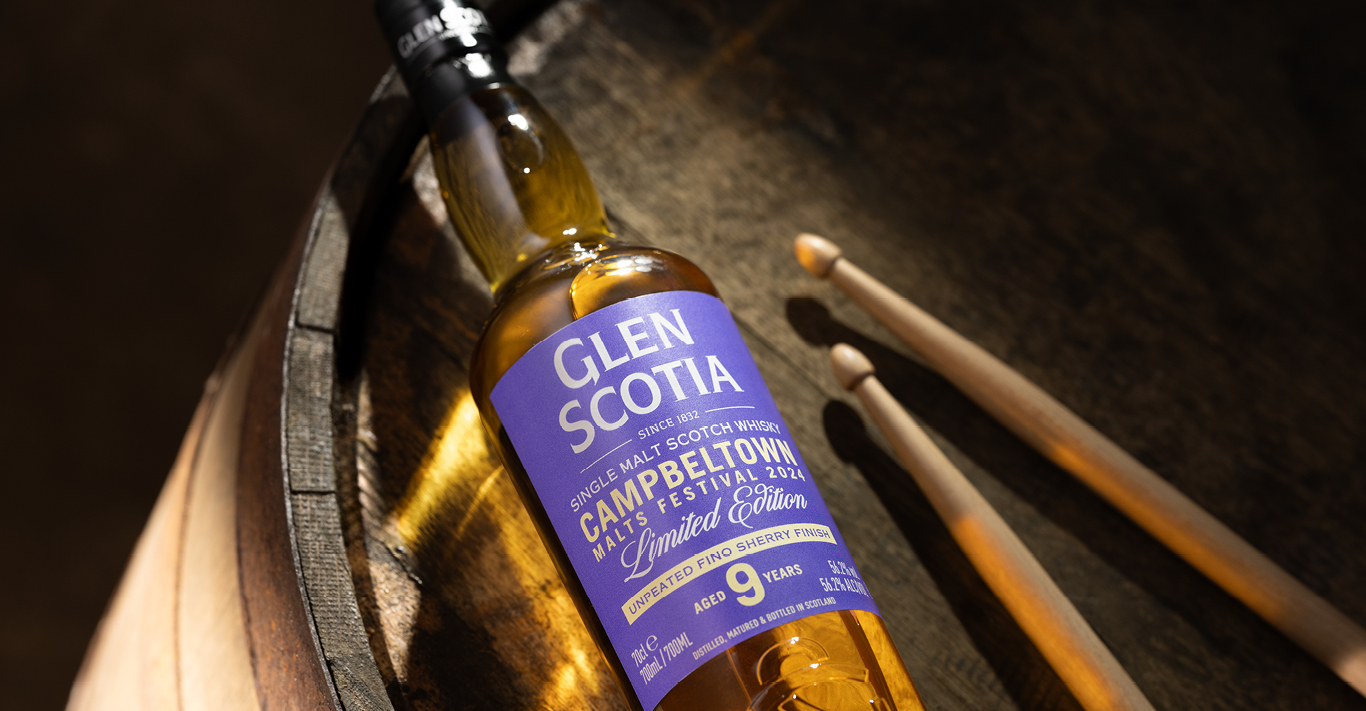
Festival season begins – whisky festival, that is
Glen Scotia’s Campbeltown Malts Festival Edition for 2024 is available online, to celebrate the latest whisky gathering which is an underrated fun alternative to the famous but hard-to-get-to Fèis Ìle